Establishing an impeccable guitar setup is pivotal for any aspiring or professional guitarist. It’s the secret sauce that elevates your playing comfort, overall tone, and the seamless production of your music. When an electric guitar is properly set up, it not only becomes an extension of the musician but also unveils a spectrum of sounds, delivering optimal musical expression. This article elucidates the steps to set up a new guitar, ensuring your instrument is finely tuned to resonate with your musical aspirations.
Inspection and assessment

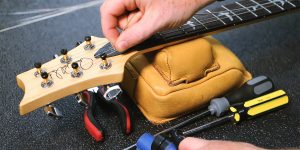
Before diving into the guitar setup, it’s necessary to conduct a thorough inspection and assessment of your instrument. Visually scrutinize the neck for any undue bends or warping, and inspect the frets for wear and tear. Loose hardware, like tuning pegs or knobs, should also be identified and addressed.
- Neck inspection: Check if the neck is straight, slightly bowed, or severely warped. A straight or slightly bowed neck is generally normal.
- Fret examination: Examine each fret for uneven wear, which could affect playability and intonation.
- Hardware check: Ensure all hardware components, like tuning pegs, knobs, and jack plates are securely fastened.
Adjusting the truss rod

The truss rod is a critical component housed within the neck of your electric guitar, functioning to counteract the tension exerted by the strings, maintaining the neck’s stability and straightness.
Truss rod types:
- Single-action truss rods: These can only adjust the neck in one direction, usually by straightening it.
- Dual-action truss rods: These offer more flexibility, allowing adjustments in both directions — either straightening the neck or inducing a forward bow.
Adjustment mechanism:
- Single-action: Tightening it straightens the neck, counteracting string tension.
- Dual-action: It can be tightened or loosened to adjust the neck either way, providing a wider range of relief options.
Step-by-Step adjustment:
- Assess the neck relief: Before adjusting, check the neck relief by sighting down the edge of the neck or using a straight edge.
- Access the truss rod: The adjustment nut is typically located either at the headstock or the neck’s heel.
- Make small adjustments: Using the appropriate wrench, make quarter-turn adjustments.
- Recheck and retune: After each adjustment, recheck the neck relief and retune the guitar to pitch.
- Repeat if necessary: Continue making small, incremental adjustments until the desired relief is achieved.
Setting string action and intonation

String action refers to the strings’ height above the fretboard, and it’s an important aspect influencing the guitar’s playability. A lower action is typically preferred for easier playability, while a higher action allows for louder acoustic volume and decreased likelihood of fret buzz.
Measuring string action:
- Utilize a string action gauge to measure the distance between the top of the 12th fret and the bottom of each string.
- Assess the measurements at different points along the neck to identify any inconsistencies.
Adjusting string height:
- Loosen the strings: Loosen the strings before adjusting the bridge or saddle height.
- Adjust the saddle: Raise or lower the saddle to your preferred string height using a small screwdriver or an Allen wrench.
- Retune and recheck: After every adjustment, retune the guitar and check the action until it suits your playing style.
Setting intonation:
- Tune the guitar: Ensure the guitar is perfectly in tune before adjusting intonation.
- Check the 12th fret: Play the harmonic at the 12th fret and compare it with the fretted note at the 12th fret.
- Adjust the saddle position: If the fretted note is sharp, move the saddle back; if it’s flat, move it forward.
- Recheck and retune: After each adjustment, retune and recheck until the harmonic and the fretted note match.
Electronics and pickup height adjustment

The electronics of an electric guitar, including potentiometers, switches, and input jacks, are paramount in maintaining optimum sound quality. It’s important to regularly check these components for any signs of wear, dirt, or corrosion and clean them with a contact cleaner to ensure smooth operation.
Steps to adjust pickup height:
- Measure the distance: Using a ruler, measure the distance between the pickup and the string at the low and high E strings.
- Adjust accordingly: Turn the adjustment screws on both sides of the pickup to move it closer or further away from the strings until the desired tone is achieved.
- Test the sound: After every adjustment, play the guitar and listen to the sound, adjusting further if necessary.
FAQ
How often should I set up my electric guitar?
Typically, a full setup, including a check of the neck, action, intonation, and electronics, is recommended at least once or twice a year.
Can I set up my electric guitar at home?
Absolutely! With the right tools, patience, and a meticulous approach, many guitarists can perform basic setup tasks at home, such as adjusting the action, intonation, and pickup height, and even more advanced tasks, such as adjusting the truss rod.
Are there any risks involved in adjusting the truss rod or making other setup adjustments?
Yes, there can be risks involved, especially when adjusting the truss rod, as over-adjusting can potentially damage the neck of your guitar. It is important to make gradual, incremental adjustments and allow the neck time to settle before making further changes.